*Before executing the teaching robot, please check if the root has completed reference point return and the indicator is on!
*The teaching robot must be set to [1 Advanced level] or above.
*All parameter settings in this chapter will be saved along with the teaching file. Please make sure to set all parameters again while operating a new teaching file.
The offset from the reference point must be set for the standby point, which can also be called as the program reference point. The standby point will serve as the reference pint for all coordinates during teaching.
[Edit] group -> [Position] tab
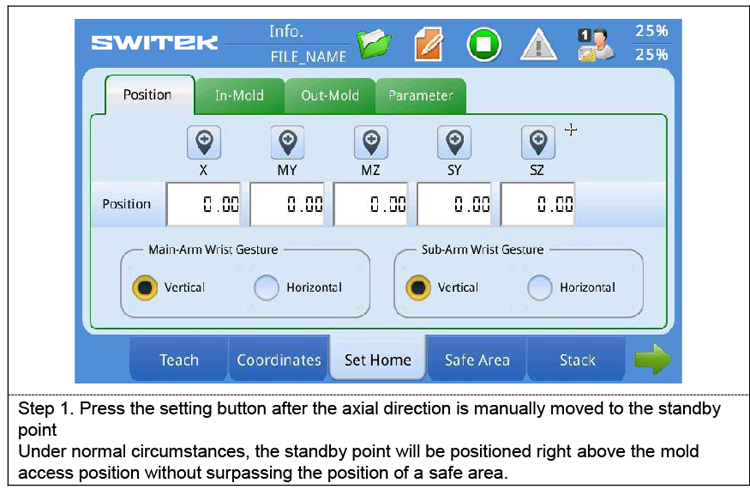
Step 1. Press the setting button after the axial direction is manually moved to the standby point.
Under normal circumstances, the standby point will be positioned right above the mold access position without surpassing the position of a safe area.
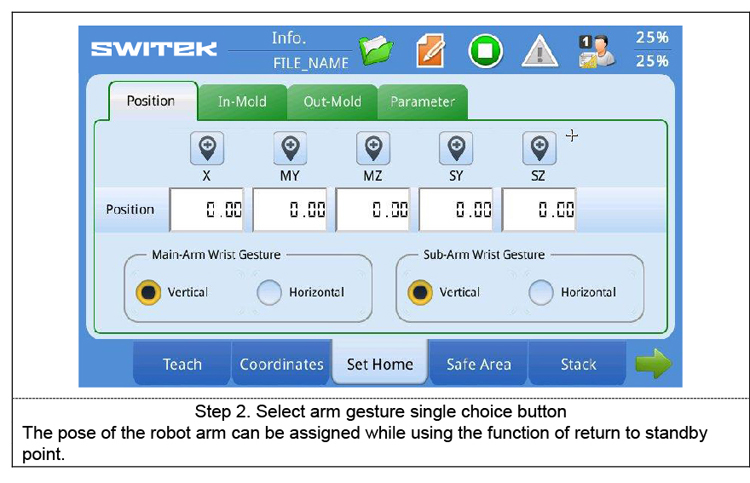
Step 2. Select arm gesture single choice button.
The pose of the robot arm can be assigned while using the function of return to standby point.
[Edit] group -> [Set Home] tab
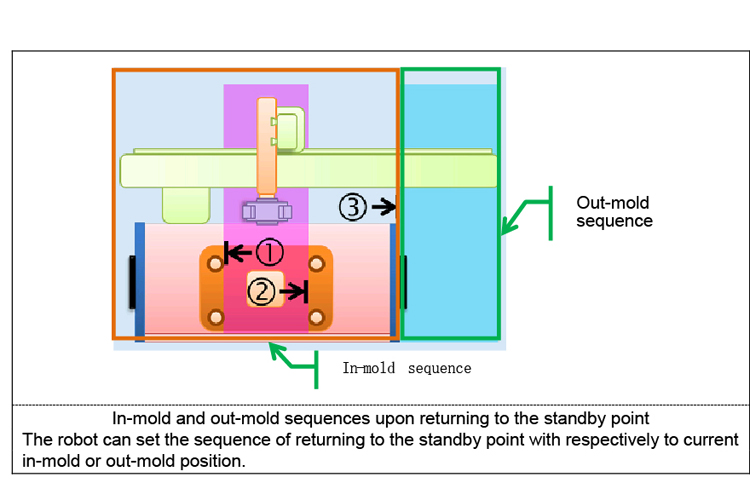
The robot can set the sequence of returning to the standby point with respectively to current in-mold or out-mold position.
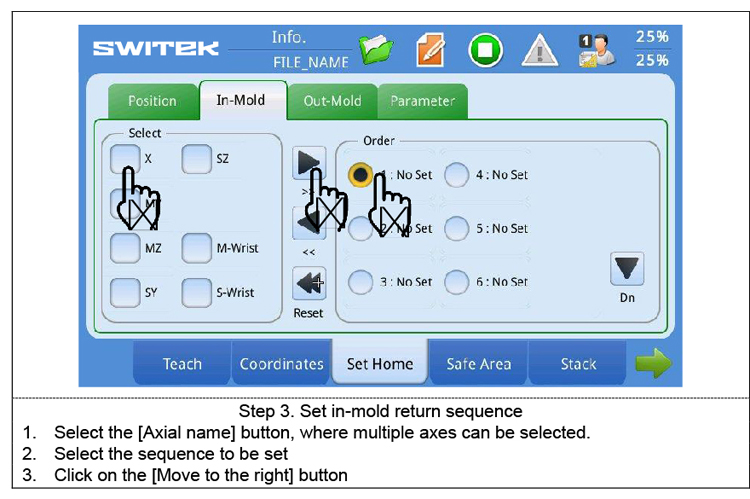
Step 3. Set in-mold return equence
1. Select the [Axial name] button, where multiple axes can be selected
2. Select the sequence to be set
3. Click on the [Move to the right] button
[Edit] group -> [Set Home] page -> [Out-mold] tab
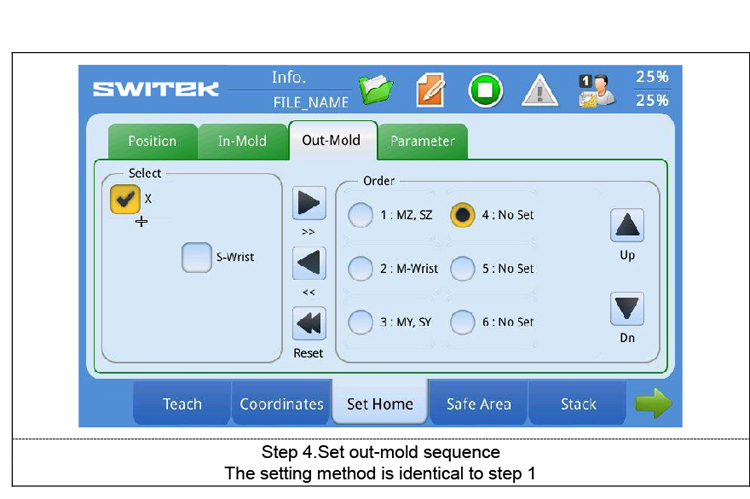
Step 4. Set out-mold sequence
The setting method is idetical to step 1
[Edit] group -> [Set Home] page -> [Parameter] tab
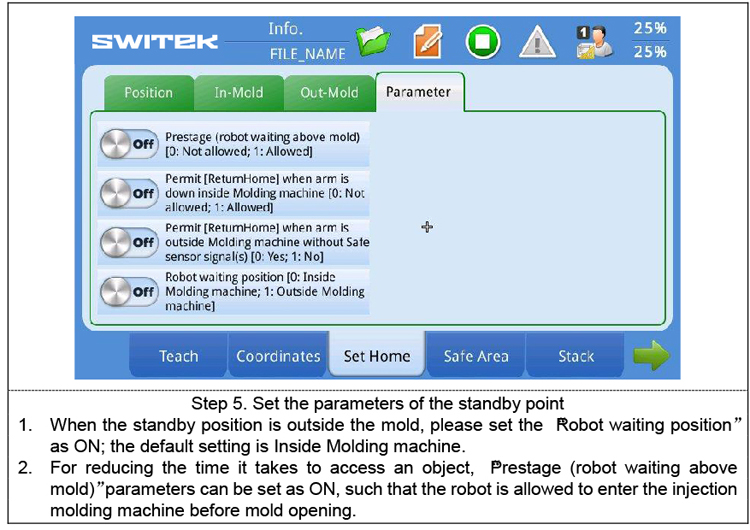
Step 5. Set the parameters of the standby point
1. When the standby position is outside the mold, please set the "Robot waiting position" as ON; the default setting is Inside Molding machine.
2. For reducing the time it takes to access an object, "Prestage (robot waiting above mold)" parameters can be set as ON, such that the robot is allowed to enter the injection molding machine before mold opening.